I did not expect a jar of seeds on my kitchen counter to become this entertaining.
But here we are.
I have always liked the idea of growing more of my own food, but living in an apartment in the city makes that feel a little complicated. I don’t have a yard. I don’t have raised beds. I don’t have some beautiful garden setup outside my back door.
What I do have is a kitchen counter, a jar, and a long history of killing plants that were supposedly very hard to kill.
So sprouts felt like a reasonable place to start.
Small enough to not intimidate me.
Easy enough that I maybe couldn’t mess it up.
Although, let’s be honest, I have surprised myself before.
Why I Wanted to Try Sprouting
I’ve been thinking a lot lately about how I can make food feel more connected to my actual life.
I’m not trying to become someone who suddenly has a full homestead in the middle of an apartment. But I do like the idea of having small things growing in my kitchen. Something fresh. Something simple. Something I can add to a salad or a sandwich and feel like, "Okay, I made this happen."
Even if “this” is a very tiny thing.
I think that’s what I liked about the sprouts. I didn’t need a huge garden bed outside. I didn’t need a lot of space. I didn’t need to know everything before starting. I'm still experimenting.
I just needed to rinse them twice a day and not forget about them.
Which, for me, still felt like a reasonable challenge.
I did start growing some broccoli sprouts after this and the growing time is far longer than my salad mix of sprouts. Of course my first thought is that I somehow killed the germination period, because I'm not completely confident in my abilities with growing things yet.
The Tiny Apartment Garden Situation
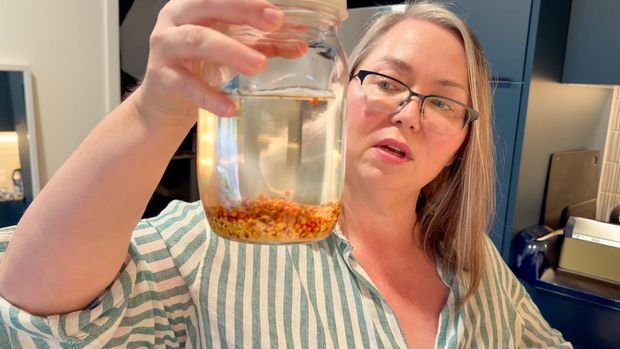
I started with a salad mix blend that had alfalfa, broccoli, radish, and clover.
I liked that it wasn’t just one kind of sprout because it made the whole thing feel a little more fun. The mix had different textures, different colors, and once they started growing, it was honestly kind of ridiculous how exciting it became.
I kept checking on them and watching them throughout the day. I was highly entertained by it all.
Did anything happen?
Did they grow?
Are they okay?
Have I already ruined this?
I know. It’s sprouts.
What I Would Do Differently Next Time
Since this was my first round, I was mostly just trying to follow the basic instructions and see if it worked.
But a few things became obvious pretty quickly.
First, I need to keep better track of which day I’m on. I ended up putting a little note on the bottom of the jar with the dates because I was already forgetting if I was on day three, day four, or harvest day.
Second, I think I’ll stagger the jars a little closer together so I always have fresh sprouts.

Join The Story Post Snail Mail Club - It's a fun way to get a unique art print that I create, a personal letter by me, slow living prompt card, recipe card, and a few extras each month.
Fresh Milled Flour Basic Yeast Dough Recipe
This recipe is for you if you mill your own grains and is adapted for fresh milled flour which is a bit different than using store bought flour.
Yield is 4 loaves in 8.5 x 4.5 loaf pans
Ingredients
- 3 cups hot water (~110 degrees)
- 2.5 tbsp active yeast
- 6 cups of wheat berries (you'll grind this to make ~8-9 cups of flour)
- I used 3 cups hard red, 2 cups hard white, 1 cup khorasan
- 2/3 cup honey
- 2/3 cup olive oil
- 4 tsp very fine sea salt
- 2 eggs
Directions
Activate Yeast:
Add 1 cup of the hot water to a bowl, then add all of the active yeast and about 2 tsp honey. Mix thoroughly and let it sit for 10 minutes to activate.
Mill Flour:
Mill your grains into one bowl and set aside.
Create Sponge in mixer bowl:
Add 1/2 of the milled flour to the bowl, all of the activated yeast, and remaining hot water.
Mix to incorporate and hydrate flour without over mixing.
Put a towel over the bowl and put inside your oven on the proof setting or turn the oven light on. Let it sit for 20 minutes to 1 hour. You'll know when it's ready when you see tiny bubbles forming on top of the mixture. It's pretty flexible so don't worry about over sponging it if you go a little longer. I've sponged for up to 2 hours before, but you really don't need that much time.
Mix Remaining Ingredients:
Add remaining ingredients to your sponge in the mixer bowl except for salt and flour.
Add salt then start adding 1/2 cup of flour at a time to get a dough ball formed.
Kneading:
I use a Bosch mixer so every mixer will be different. I kneed on setting 2 until the bowl is almost wiped clean with a dough ball and I get window pane. In my experience, I'm kneading between 10-13 minutes. Every climate and temperate will be different.
First Rise:
Transfer dough ball to a container to rise. It will need to double so make sure you container can handle the size.
I use a shower cap to cover the top to keep it moist inside and then place in the oven on the proof setting or turn the oven light on.
Once it's doubled in size remove from the oven.
Second Rise:
Next weigh your dough to even distribute the dough between your four loaf pans. Refer to my video if you need to see how to roll the dough into a loaf.
Make sure your pans are greased so bread loaf won't stick.
Put a shower cap over each loaf pan and place back into the oven for the second rise. I generally wait until it's at the top of the loaf pan.
Baking:
Preheat the oven to 350. Remove the shower caps from the loaves and place back into the oven to bake for 25-30 minutes until the temperature inside the loaf is 190 degrees.
Cool pans on a rack for 10 minutes before removing bread from the loaf pan.
Transfer loaf to the cooling rack and allow it to completely cool before cutting (if you can).
These freeze very well.
Resources and Things Mentioned
Here are some of the items or similar resources from the video that I’ll try to link. Some may be affiliate links, which means I may earn a small commission if you purchase through them, at no extra cost to you.
Bread making equipment: https://amzn.to/42Wqus5
Sprouting jars: https://amzn.to/4nmoFhB
Sprouting lids: https://amzn.to/4dtUqBX
Salad spinner for drying sprouts: https://amzn.to/42YecPU
Salad sprouting seed mix with alfalfa, broccoli, radish, and clover: https://amzn.to/42IyrBj
Japanese-style divided bowls: https://amzn.to/4eCfUxF
Laura's pottery: https://www.instagram.com/nightowlcreationslb
The Table
I also host a small membership space here on the site called The Table. I called it that because I picture it as people gathered around a table — probably with a piping hot mug of coffee or tea — talking, listening, asking questions, and sharing their experiences. We also have a small book club there where we will read and talk about books together.
If that sounds like your kind of space, you’re always welcome to pull up a chair to "The Table".

The Table: A small, thoughtful space for conversation, shared experiences, and slowing down together.
Leave me a comment here on the post and let's keep the conversation going.


